Identifying Common Water Heater Problems
Common issues with water heaters often include:
No or Low Hot Water
If you’re faced with the dilemma of no hot water flowing from your taps, possible causes include:
- Faults within the lower heating system or thermostat
- Tripped circuit breaker or blown fuse
- Sediment buildup in the tank
- Pilot light is out (for gas heaters)
- The high-temperature limit safety feature has activated
Water Temperature Fluctuations
Unexpected extreme fluctuations in water temperature could be due to a faulty thermostat or heating element.
Water Leaks
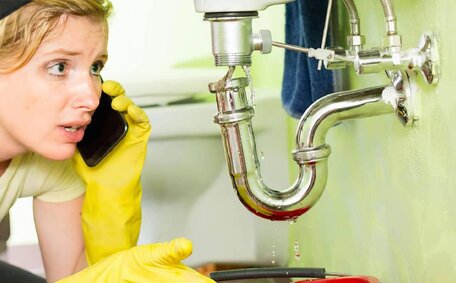
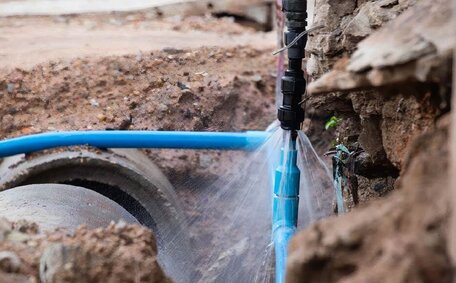
Inspect your water heater for leaks, which typically stem from issues like loose connections, a fractured tank, deteriorated gaskets, or the T&P relief valve.
Strange Noises
Strange noises such as clanging, rumbling or hissing often point to sediment buildup or malfunctioning parts, which can disrupt hot water supply.
If there’s an issue and your tank yields no hot water, promptly shut off the power and water supply for safety. Investigate the water heater’s electrical connections and internal components to diagnose and resolve water service disruptions. Replace parts as necessary or, if the tasks go beyond DIY, recognize that you’ll need professional assistance to restore hot water.
Checking Electrical Connections and Power
Follow these steps to address any issues with your water heater’s electrical connections and power supply:
1. Locate the Circuit Breaker
Find the circuit breaker for your water heater in your home’s main electrical panel, typically labelled, and switch it to the off position.
2. Remove the Access Panel
Remove the water heater’s access cover to reach the power terminals and electrical connections.
3. Inspect Wiring
Check the wiring for secure connections, ensuring there are no loose, damaged or burnt wires and that all connectors are tightly secured.
4. Check Continuity
Use a multimeter to test the upper heating element for continuity while the power is off. A resistance of about 13 ohms indicates normal function; otherwise, it may require replacement.
5. Ensure Proper Grounding
Confirm that your electric hot water heater is aptly grounded for electrical safety. This gives stray electrical current a safe path to flow if there’s a short circuit.
6. Reset Breaker and Test
Engage the circuit breaker once more to figure out if power is keeping your water heater working proficiently. After inspecting and resetting the electrical connections, turn on the hot water to find out if your adjustments have resolved the issue before moving to repairs.
For safety and proper operation, particularly when encountering hot water issues, it is wise to consider professional services.
Inspecting and Resetting Components
It’s crucial to thoroughly inspect key components like the high-temperature limit switch and upper thermostat within your hot water system. These help regulate the temperature setting and prevent overheating.
Checking Thermostats
Set your multimeter to test for continuity and check the wiring of your electric water heater’s upper and lower thermostats individually. At room temperature, the thermostat should exhibit electrical resistance; the absence of continuity implies it is defective and requires replacement.
Resetting Limit Switch
Should water temperatures rise excessively, the high-temp limit switch kicks in, cutting power as a safeguard. Locate it near the thermostats and check if a reset button has popped out. If it fails to reset, the limit switch likely needs replacing.
A detailed inspection and reset of these components can frequently restore hot water flow, potentially avoiding the need to replace major parts. If a hot water heater issue persists, reaching out to a professional plumber for service is advisable.
Testing and Replacing Heating Elements
Testing and replacing faulty components in your element heating system is crucial for restoring hot water. Here are the steps:
Test Upper Element
Attach the multimeter probes to the corresponding element screws to test for accuracy. An operational element should show around 13 ohms resistance; a lack of reading signals a need for replacement.
Test Lower Element
Conduct the resistance assessment on the lower heating element’s screw terminals post wire disconnection. Replace if faulty.
Replace Heating Elements
Disconnect the wiring from the defective element and unscrew it counterclockwise.
Clean mineral deposits off new element, apply thread seal tape and hand tighten into place. Reconnect wires, refill tank and restore power once both elements test good.
Have a professional assess advanced electrical issues.
Checking for Leaks and Corrosion Damage
Inspecting your water heater for leaks and corrosion damage regularly is important to help prevent major issues down the line. Here are some key things to check:
Drain Valve
Investigate the drain valve positioned at your hot water unit’s base to inspect for potential leaks. Look for any dripping water which could indicate a faulty valve seal. Replace the entire valve if leaking persists.
Pipe Connections
Check where the cold water inlet and hot water outlet pipes connect to the tank for drips or moisture. Tighten any loose pipe fittings which could be allowing water to escape.
T&P Relief Valve
Inspect the temperature and water pressure relief valve situated near the tank’s apex. Ensure the valve hasn’t activated or isn’t permitting water coming out via the overflow pipe.
Anode Rod
Remove and inspect the anode rod, typically inside the top of the tank. Look for significant corrosion which reduces effectiveness. Replace if worn.
Tank Exterior
Check the full exterior of the tank for signs of moisture, rust and corrosion damage which can lead to leaks. If severe, the entire hot water systems may need replacing.
Addressing minor leaks promptly can avert significant issues later. Yet, significant corrosion usually suggests that the unit is nearing the end of its useful life.
Flushing the Tank
Routine flushing of your water heater is essential for sediment removal and to extend the unit’s service life. Here is a step-by-step guide for properly draining your tank:
1. Turn Off Power Supply
Locate the circuit breaker for your water heater and switch it to the "off" position. Also, check gas supply termination to ensure safe operation if your appliance is a gas hot water heater.
2. Shut Off Cold Water Supply
Shut off water supply by turning the cold water valve entering the tank to the closed position.
3. Connect Garden Hose
Attach a garden hose to the tank’s drain valve, allowing sediment-laden water to be expelled to an appropriate drainage area.
4. Open Drain Valve
Slowly open the water heater drain valve. Commence the draining process, and you’ll see sediment and water coming out. Allow tank to fully drain.
5. Close Drain Valve
Once water runs clear with no sediment, close the drain valve. Disconnect garden hose.
6. Refill the Tank
Reopen the cold water supply to refill the tank before re-engaging the power. Check for leaks.
An annual tank flush can remove mineral build-up, enhancing your heater’s efficiency and longevity.
Replacing Defective Parts
For a gas water heater, you may need to replace parts such as the thermocouple, pilot assembly, or gas valve. For your unit’s water heater, common defective parts include heating elements and thermostats.
Replacing Thermocouple
The thermocouple is part of the pilot light assembly. Utilise a multimeter to examine the upper element heating system for electrical continuity. No continuity means it needs replacing.
Cease gas control by turning off the supply, remove the old thermocouple, seal threads on the new component, and fasten into the gas valve.
Replacing Pilot Assembly
Should the thermocouple be functional but your pilot light refuses to ignite, consider replacing the entire pilot assembly. Shut off gas supply, detach lead from old assembly, unscrew and remove it before installing new one.
Replacing Gas Valve
The first thing to consider if the pilot won’t light and there’s no hot water in your system is the possibility of a defective gas valve. Turn off gas, disconnect all wiring, unscrew faulty valve and install an identical new gas valve made specifically for your heater model. Have a professional service if unsure.
Refer to the water heater manual for proper replacement parts to match your specific make and model for safe, reliable operation.
When to Call a Professional
Here are situations where it’s prudent to seek a professional plumber’s help with your water heater instead of attempting DIY:
Gas Connections
Gas water heaters operate with pressurised combustible gas, which poses significant risks if handled improperly. Unless you have extensive HVAC experience, do not attempt any repairs involving gas valves, thermocouples, pilot lights or burners. Utilise Northmead Plumbing’s expertise for gas water heater issues; sign up for up our newsletter or dial 1300 349 338 for assistance.
Electrical Issues
While checking electrical continuity is typically safe for electric heaters, gas water heater malfunctions may require the expertise of a licensed electrician. Our expert technicians are well-versed in the intricacies of gas electric water systems and can safely perform all essential electrical repairs.
No Hot Water After Troubleshooting
Should you remain without any hot water, your troubleshooting might require professional diagnosis and further servicing. Significant parts like the thermostat, high limit switch or entire control unit may need replacement.
For reliable water heater repair and maintenance in Northmead, reach out to Northmead Plumbing at 1300 349 338 or email jobs@northmeadplumbingservices.com.au.
Maintaining Your Water Heater
Regular maintenance on your water heater is key to ensuring optimal efficiency and longevity. Here are some tips:
Flush the Tank Annually
Draining sediment extends tank life and heating efficiency. Refer to previous steps on proper flushing technique.
Inspect Anode Rod
Check the anode rod yearly and replace if corroded. This protects the tank from rust.
Check Valves and Pipes
Yearly inspections of valves and pipes attached to the water tank are crucial for identifying leaks. Secure or replace as needed.
Clean Filters
Clean the inlet filters of tankless water heaters regularly to ensure efficient heating and unobstructed water flow.
Hire Annual Service
Consider professional preventative maintenance to keep your system running efficiently. The team at Northmead Plumbing provides reliable hot water service. Call 1300 349 338 or email jobs@northmeadplumbingservices.com.au to schedule.


